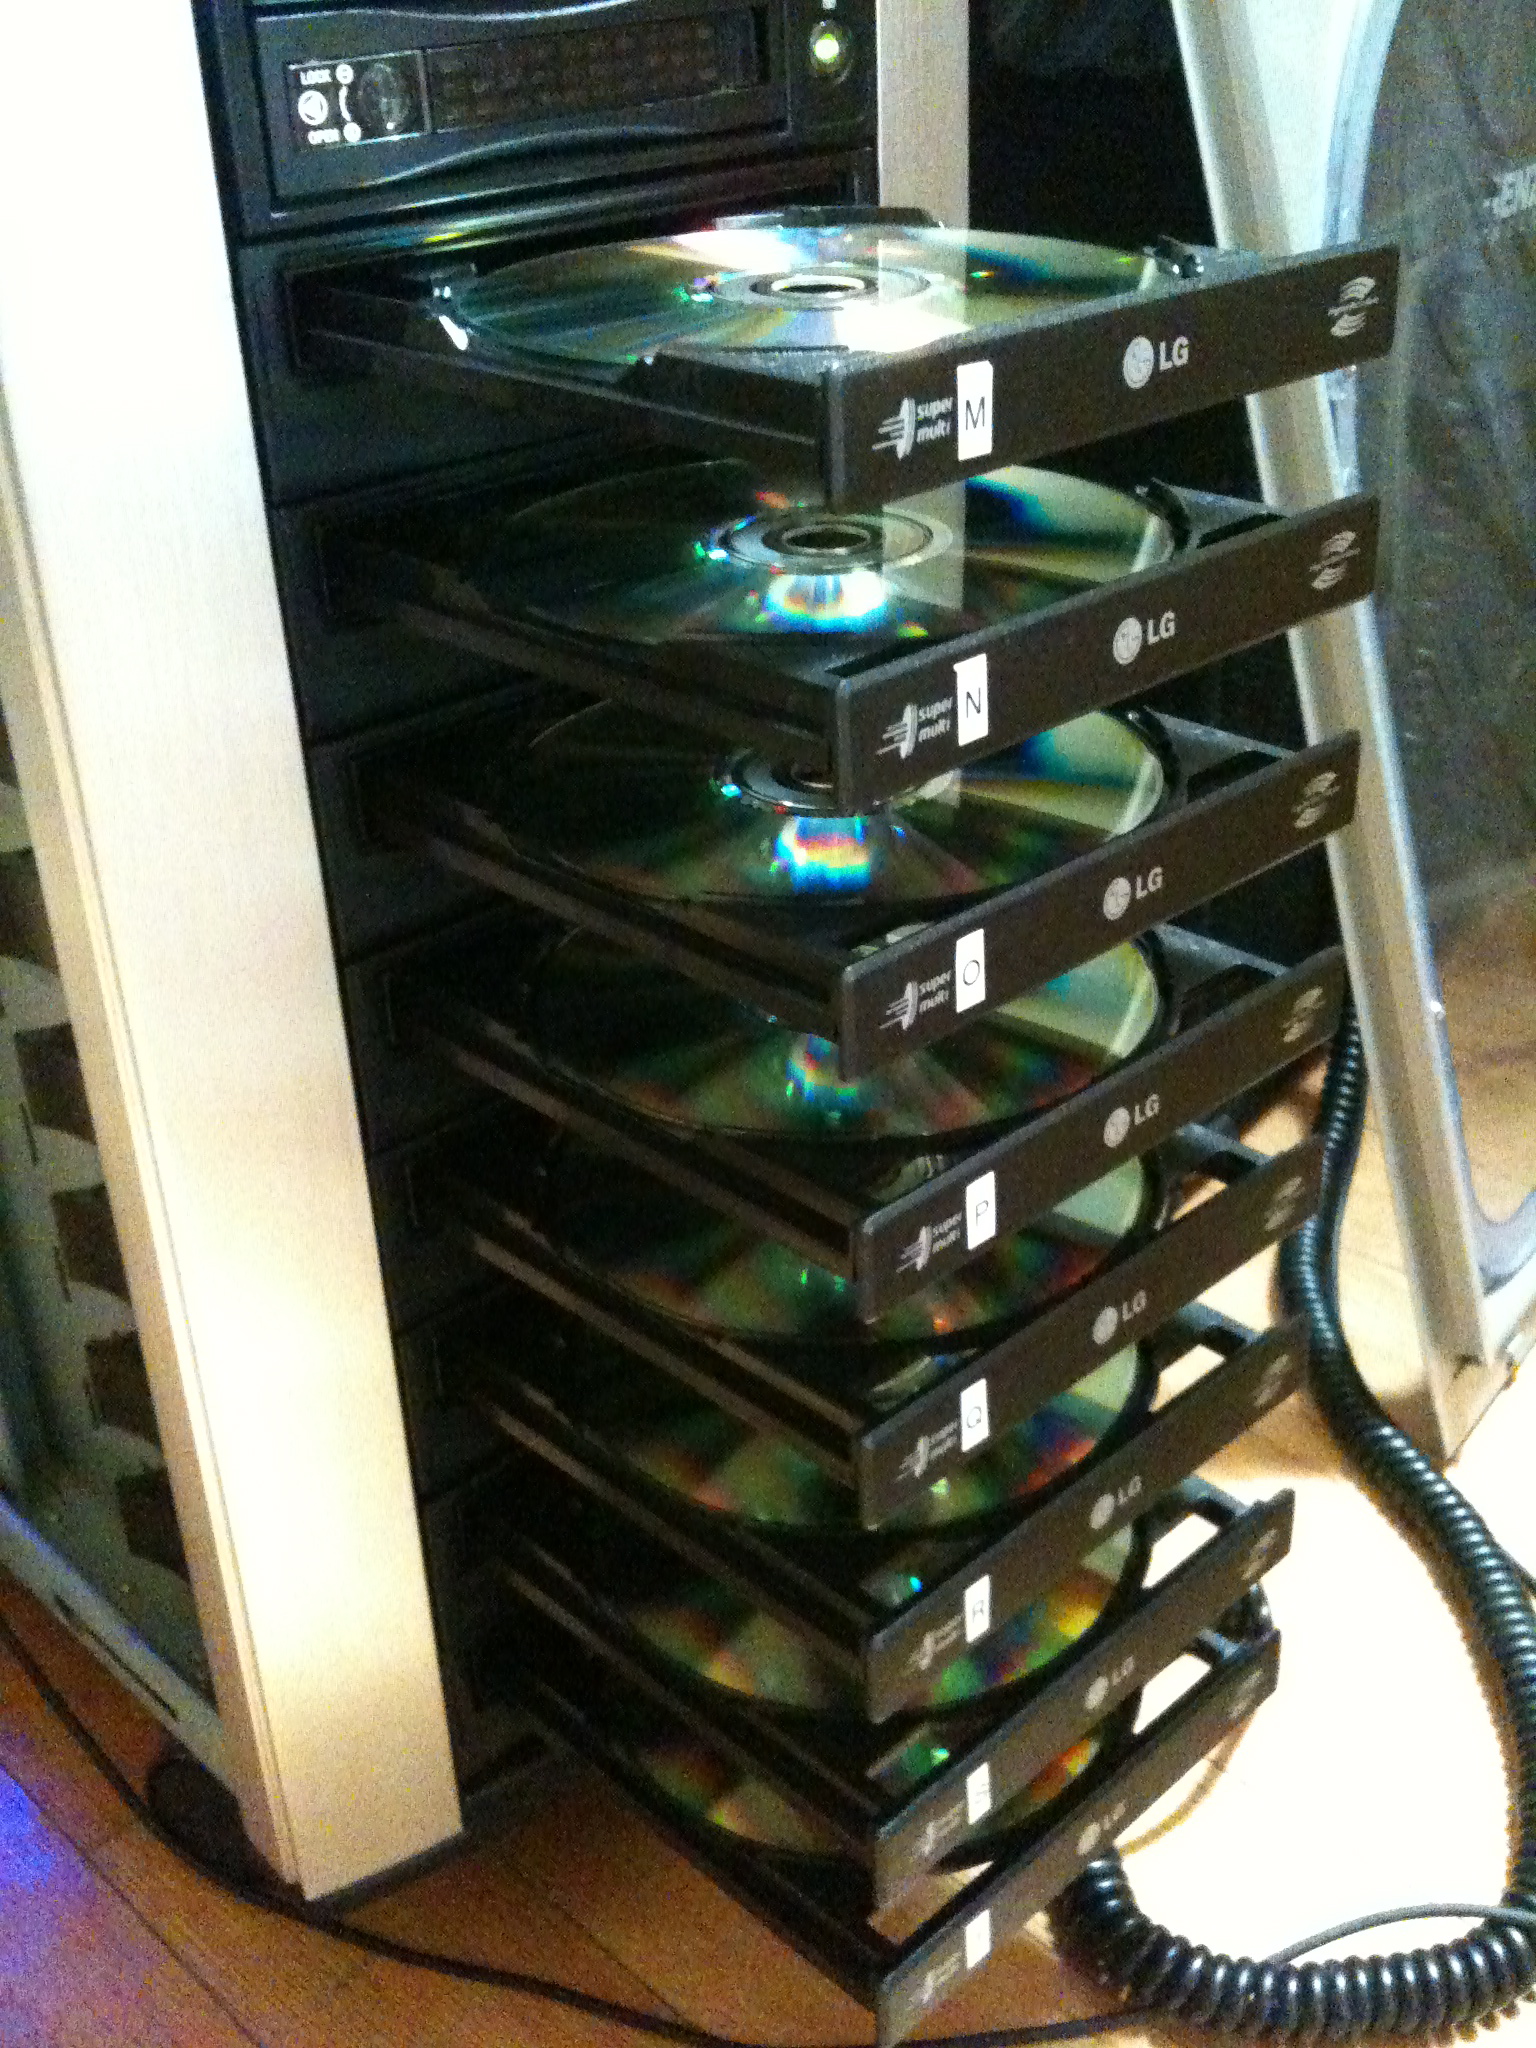
I’ve slowly updated components of The $1K Home Studio over the last few years, but have never had a low-cost, DIY solution for disc replication. After playing with external CD burners and evaluating various proprietary hardware options such as the Aleratec auto-flip burner , MicroBoard tower replicators amongst many others, I decided that the current commercial solutions are nice, but most definitely overpriced. So I decided to develop my own solution. This custom-built behemoth is built from common off-the-shelf (COTS) hardware from Fry’s Electronics and inexpensive commercial software. It costs less to own than commercially branded replicators, and also functions as a normal desktop computer since it runs Windows 7 and Linux. (I took care to also buy a Gigabyte-brand motherboard that supposedly supports the OSx86 (“hackintosh”) project, but have had little success with the installation.)
Hardware
- Intel i5 750 64-bit CPU. (Features 4 cores.)
- 4GB RAM.
- 8 x (yes, eight) Lite-On CD/DVD 5.25″ SATA burner drives.
- Gigabyte motherboard with lots of SATA ports.
- Add-on SATA card. (Most motherboards won’t have enough connectors, especially if you have 8 x burners plus 4 x hard drives. 🙂 )
- Big-ass power supply. (The first one I bought wouldn’t even boot the thing. I put in a monster and everything started working.)
Software
The point of all these burners is to burn simultaneously to all of them, but Windows 7 and OS X cannot do this out of the box. Only a small subset of CD/DVD burning software on the market supports parallel burning, and some only seems to support multiple burners for specific types of burns. What’s worked best for me so far is…
- Nero Multimedia Suite 10 for concurrent audio and data burning with multiple burners. You don’t have a lot of easy-to-use alternatives here, and I’ve also noticed a few glitches with Nero. Keep your eye out for sales here and you can pick up a copy dirt cheap.
- Acoustica CD/DVD Label Maker for concurrent LightScribe replication across multiple burners. Again, not a lot of options here. The free software from LightScribe.com does not support multiple burners, though some vendor-specific bundles seem to. (LaCie’s LightScribe software in particular appears to support simultaneous LightScribe burns, and they also have a Mac version. I would have went with a Mac-based solution, but 8 x USB 2.0 drives probably would not work so well.)
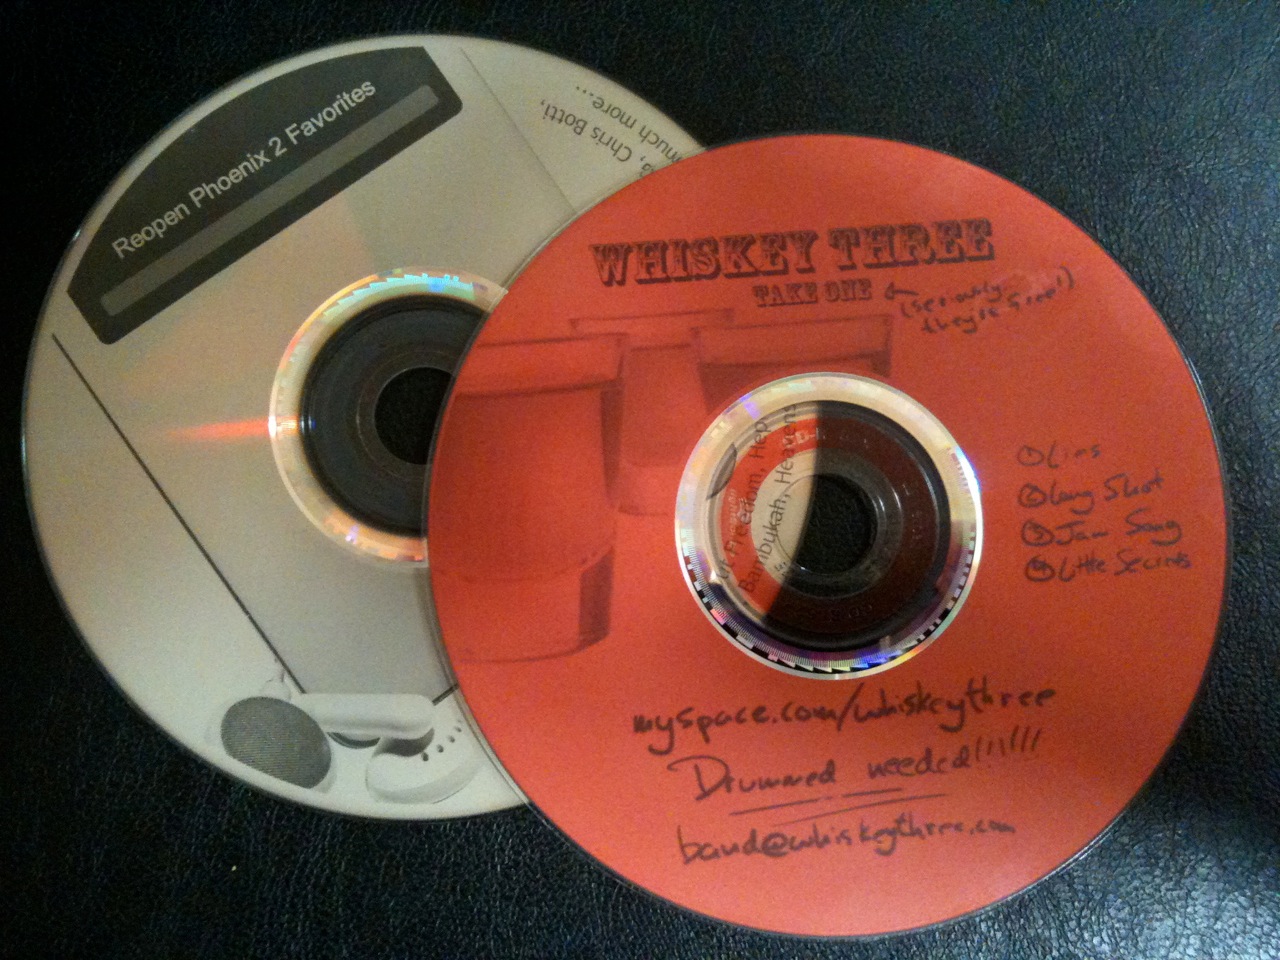
I decided to create all my replicated discs using LightScribe technology. This allows me to flip LightScribe CD-Rs upside-down in the burner and use the laser to burn custom graphics onto the top of the disc. I also made the command decision to use COTS cd sleeves instead of CD Jewel cases or slimline cases. The plastic ones are more expensive, always crack, and are pretty much useless from the start since most people seem to rip their CDs nowadays anyway. Sleeves protect the disc, come in many colors, are far less expensive, even cheaper in bulk, and perhaps best of all can be printed on directly though ordinary laser and ink jet printer.
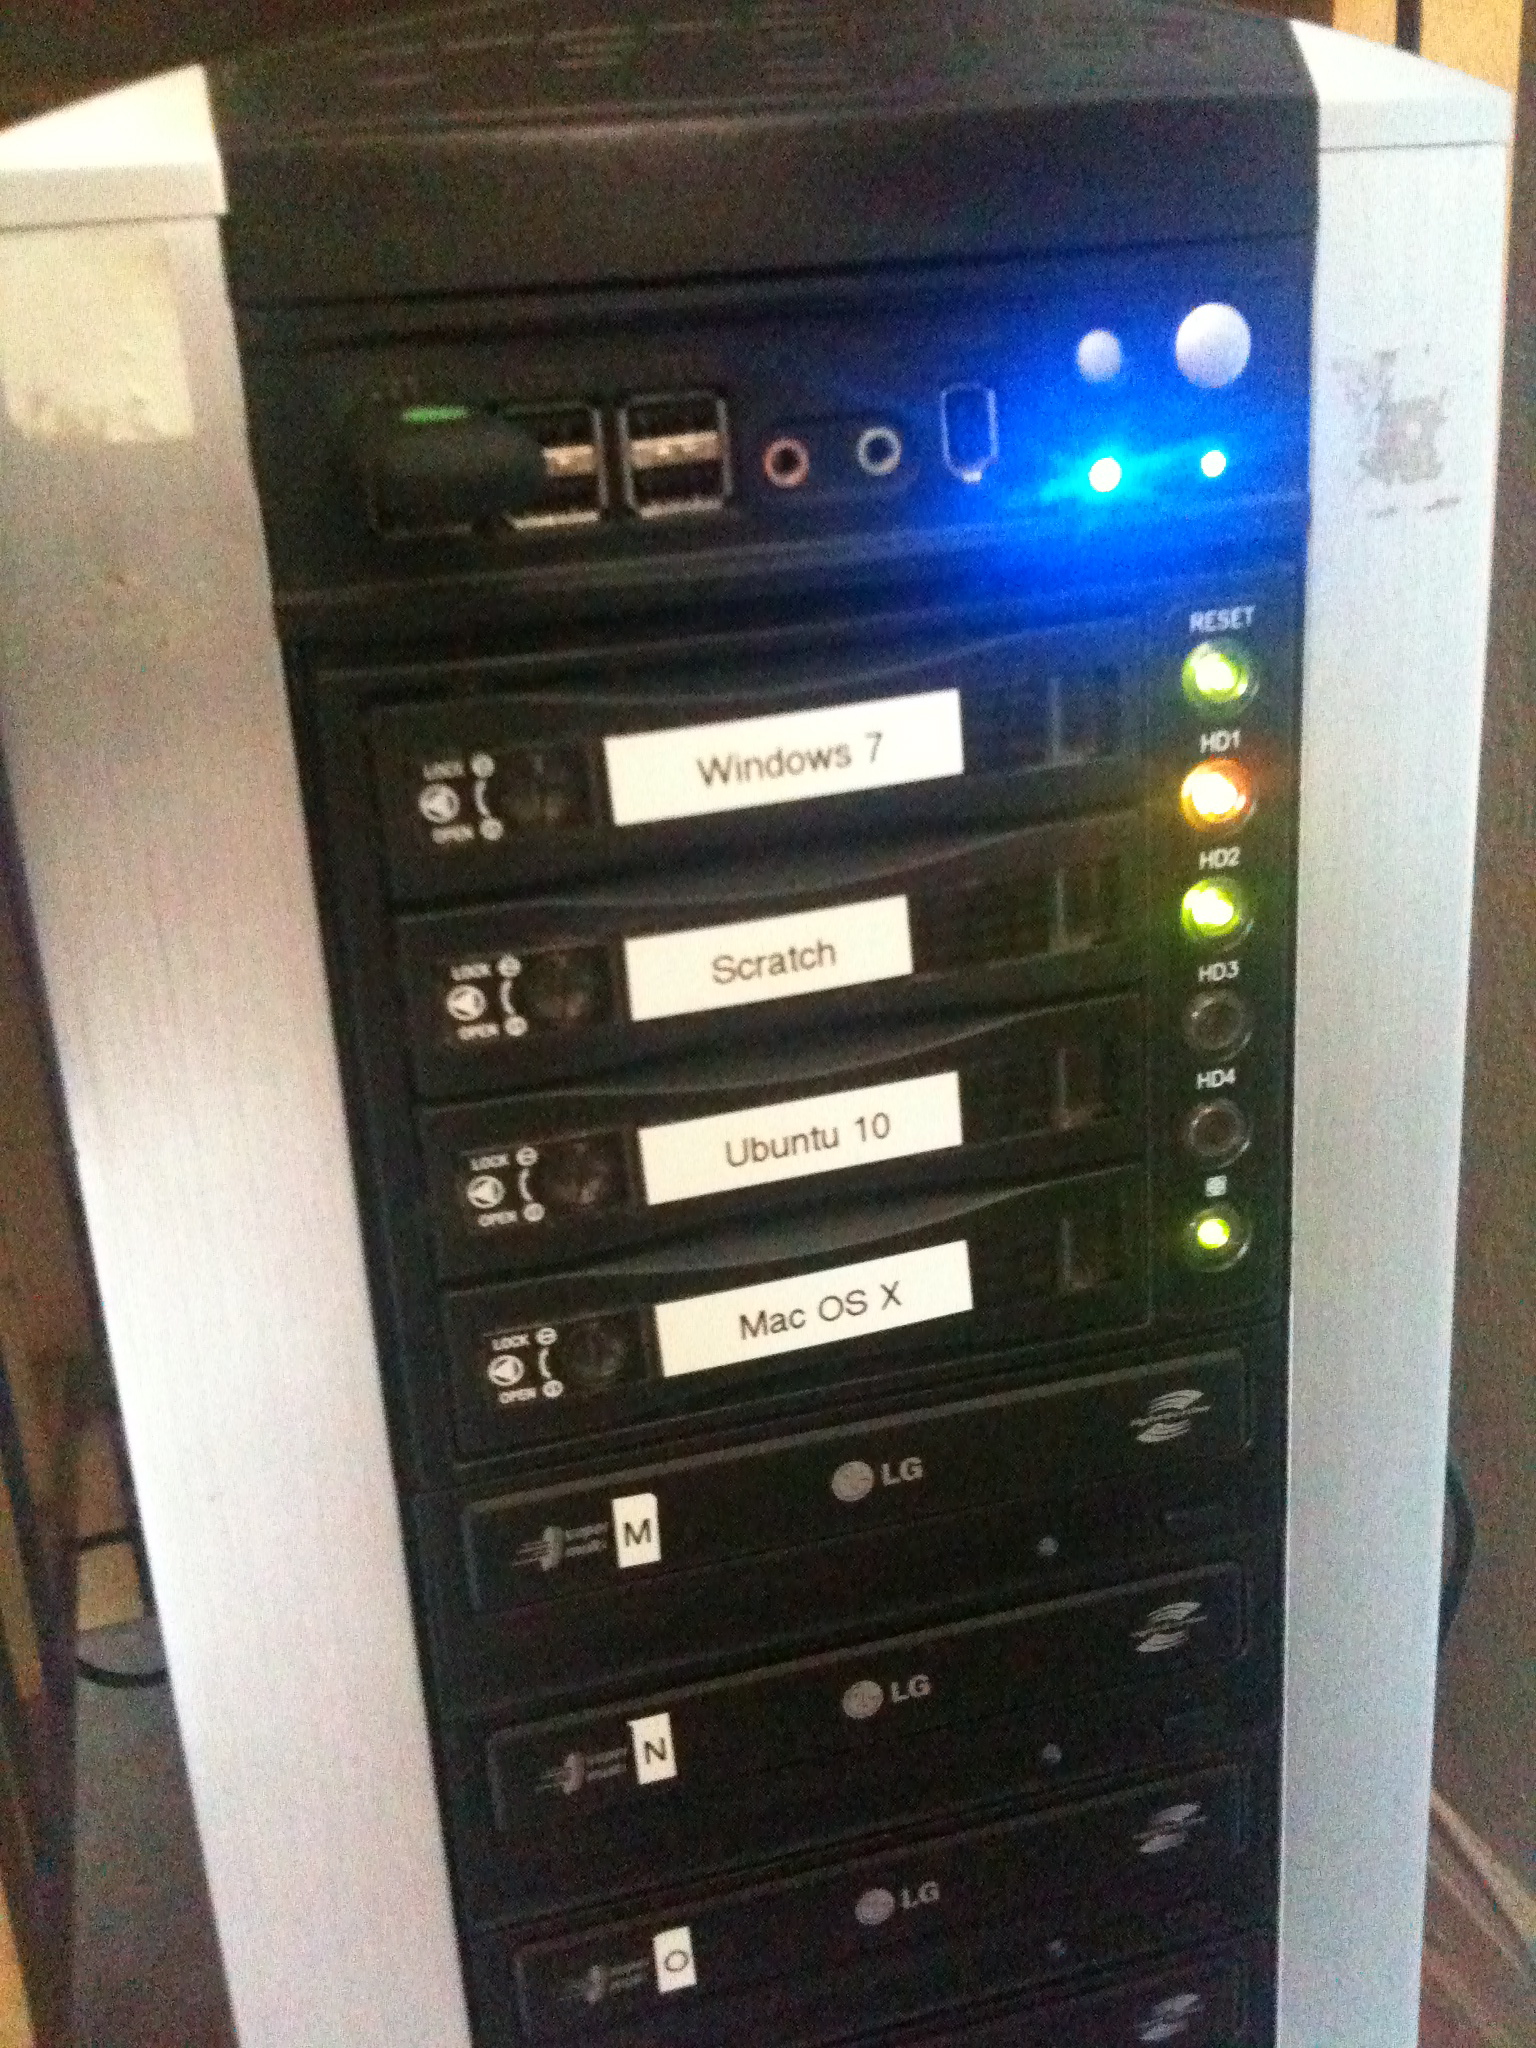
System Pros
- Inexpensive initial fixed cost of hardware parts and software licenses.
- Inexpensive variable cost per disc since LightScribe labeling uses the drive laser instead of ink. There are no costly consumables to replace. (Ordinary LightScribe media purchased in bulk works great.)
- Quick data, audio and LightScribe replication using 8 concurrent burners.
- Doable by anyone capable of building of PC with a little time can build one.
- Functions beautifully as a normal desktop computer.
System Cons
- Not completely automated like some commercial units because disc loading, unloading and flipping (if using LightScribe) is a manual process.
- Still uses CD-Rs. These are not the same as commercially pressed mass media discs, but a lot cheaper.
- (This one is only applicable to audio.) I’ve yet to find inexpensive parallel burning software that can handle DDP images. (The standard in “Red Book” audio CD mastering.)
- Since LightScribe labeling uses the drive laser instead of ink, disc labels are grayscale only. (Note: You have a lot of options in disc color, though, so it’s not a big deal. Just use your creativity.)
Replication Process Overview
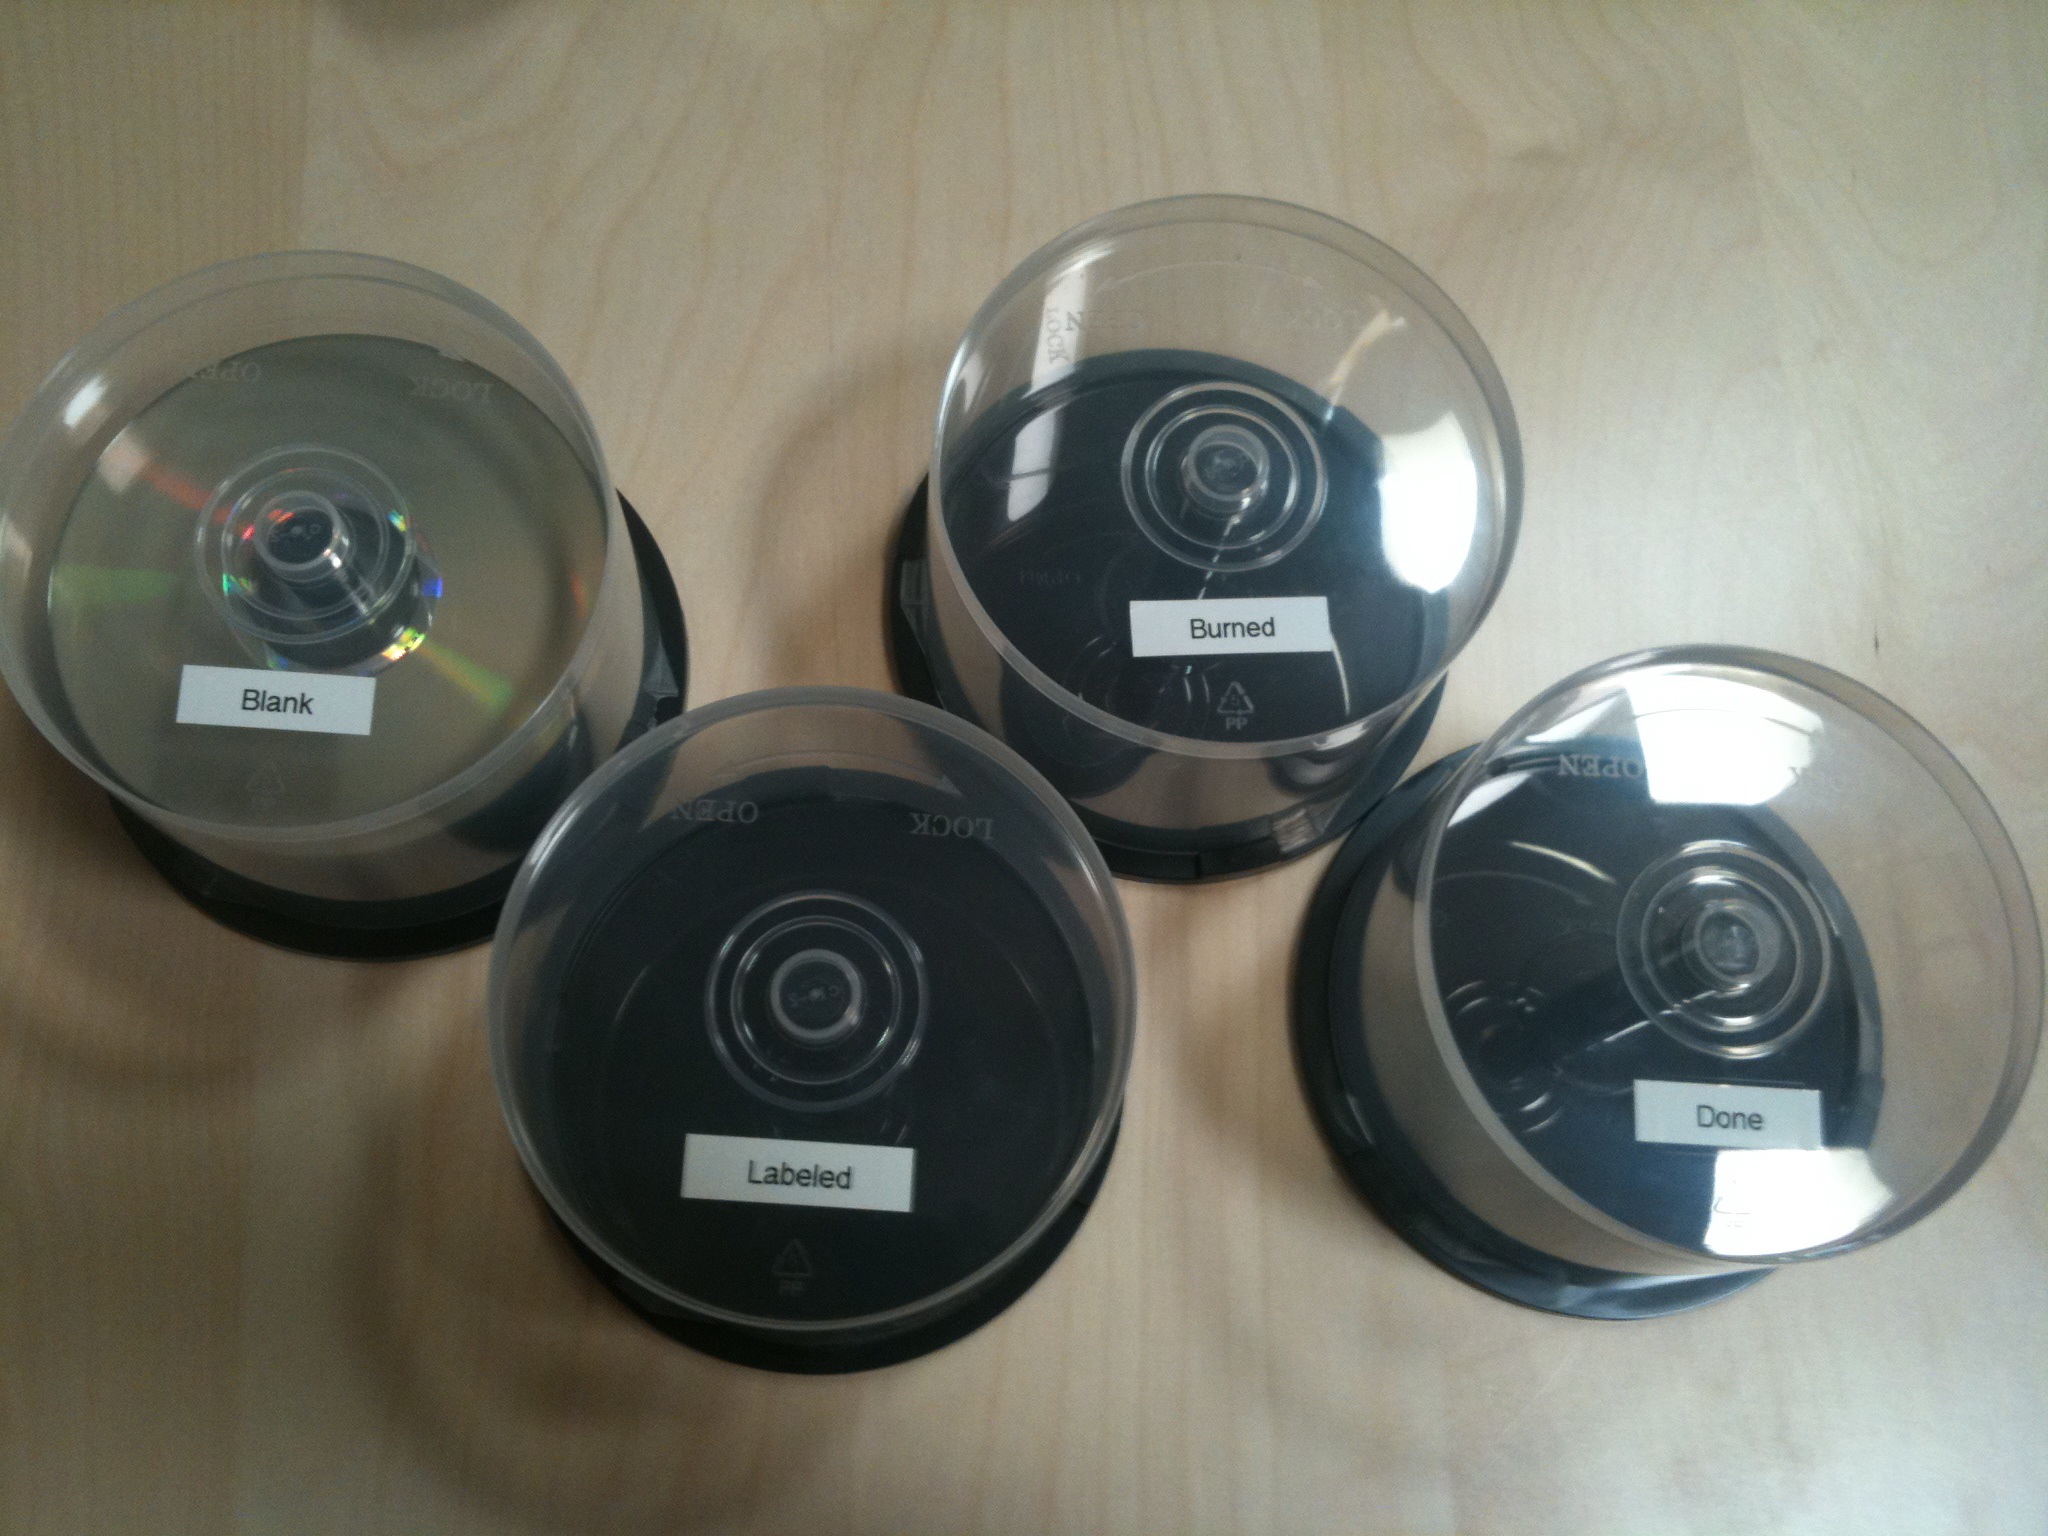
My primary purpose for this buildout is to replicate audio CDs as quickly as possible for Sonic Binge Records: the awesome music production company. In particular, I need to quickly replicate a pancakes worth (usually 25-50) of audio CDs as inexpensively as possible. After much trial and error with the process, this is what I’ve found works best.
- Create final CD master image. (For me that’s using WaveBurner on a Mac. For replication purposes it doesn’t really matter as long as the master is good.)
- Take four empty CD pancake containers and label them “Blank”, “Burned”, “Labeled”, and “Ready” to create an assembly line process. You can of course save these for future jobs.
- Use Nero Burning ROM to replicate batches of 8 at a time. When they’re done, be sure to put them in the “Burned” stack so you don’t get burned discs confused with “Blank” discs.
- While they’re burning, create a square grayscale graphic for LightScribe burning. (Free label creator software is available, though anything like Photoshop works too. I usually use a combination of Photoshop and Acoustica.)
- Use Acoustica to label batches of 8 at a time. Each batch will take a while. Full-disc burns seems to take around 30 minutes per batch: much longer than the data/audio side of a standard CD-R. Moved discs to the “Ready” pile when they’re done. (Note: The “Labeled” pile is for discs that have been LightScribe labeled but not burned with data or audio. You can end up in this situation when using multiple computers to do burning.)
- While they’re burning, use your favorite document application to design your printed CD sleeves. I’ve started buying color variety packs in bulk packs of 300 to keep options high and costs down.
- Bulk print the entire order of sleeves in a single run. As long as you can set the size of the feeder tray, your existing feeder should work fine. (CAUTION: remember that the “window” is made of plastic, and can melt if exposed to heat. Think twice before trying your laser printer. 🙂 )
- Take discs from your “Ready” pile (as they finish getting labeled) and slip them into sleeves to create the final product, suitable for general distribution. The imaging lasering adds a great, distinctive touch, and of course you can get as creative as you want with the sleeves, too.
- Done! (aka beer time.)
Costs
- Fixed: ~$1K for the machine build, with about $400 of that just for the burners. I reused/reposed parts from old junker machines where I could, and could have saved some money by buying online. I was in a rush and just went to the store.
- Variable: Roughly $0.40 – $1.00 per disc, depending on the disc quality, packaging, ink etc. you decide to use for each project. (All things considered, the $0.40 version looks pretty decent!)
Closing Thoughts
If you’re a musician without computer skills I would not recommend attempting this project, but if you feel fairly comfortable putting together machines, it’s honestly not that hard. It’s just a PC, after all. (Disclaimer: I do have a degree in Computer Science and Engineering, so my perspective of “not that hard” may be a bit skewed.)
I hope you’ve found this rough how-to guide both inspirational and informative. It’s very useful to have a replication machine handy, and if you’re actively working with people on projects intend for distribution it’s a great investment!
Please use this comments section for all your general comments and questions and I’d be happy to address them. Thanks for reading!
